Digging Tunnels
When developing a web app of any sort, usually you have a local server on your local machine. The server is running your app, which you can access using your favourite browser. Later on, when the moment is right, the app is deployed to a public server. From there you can access it from any other machine or mobile device.
Sometimes however you'd want to make your local server publicly accessible. Here are just a few reasons why this might be useful:
- Developing a mobile web app. While you can use various emulators locally, they are not really replacing any real device. Being able to access local server from any mobile device while developing the app is a huge benefit.
- Collaboration. You can send a public link to your colleague (or client) and have them try the real app. Again, they can very well try your app on their mobile devices, on the go.
- Breaking out of the virtual box. Some companies prefer putting development environments into various kinds of virtual terminals. With local tunnelling you can stream the app out of the box into your local machine - or well, to any machine.
If you are connected to a local network, in many cases machines on the same network will be able to access your local server just by entering your machine name and port into a browser. If you are on wi-fi network, you could also access your local server from any mobile device hooked to the same network in exactly the same way.
But what to do if that's not enough?
Level 1: Simple SSH tunnel
Assuming that you are developing on your own machine, which has unrestricted access to the internet. There are a number of services that allow SSH tunnelling of your local server to the public internet.
- Ngrok - originally a Ruby Gem called localtunnel, now evolved into a proper web service. Simple to use.
- PageKite - a Python script with a number of interesting features.
- OpenSSH, or simple plain
sshcommand on your Mac/Linux console also allows you forwarding local traffic to the outer world. Here is one instruction how. - Tools like BrowserStack and SauceLabs also offer forwarding traffic from your local server.
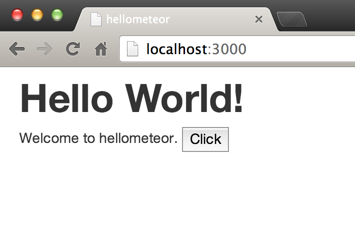
In order to have something to forward we are going to quickly bootstrap a Hello World Meteor app. Here it is, running on localhost:3000.
Let's install ngrok and run it with the following command:
./ngrok 3000
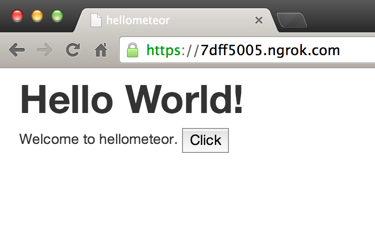
This command will initialise SSH tunnel and now our local server is available via two public URL:s via both HTTP and HTTPS. If we try and open one of those in the browser, we will see our familiar app view.
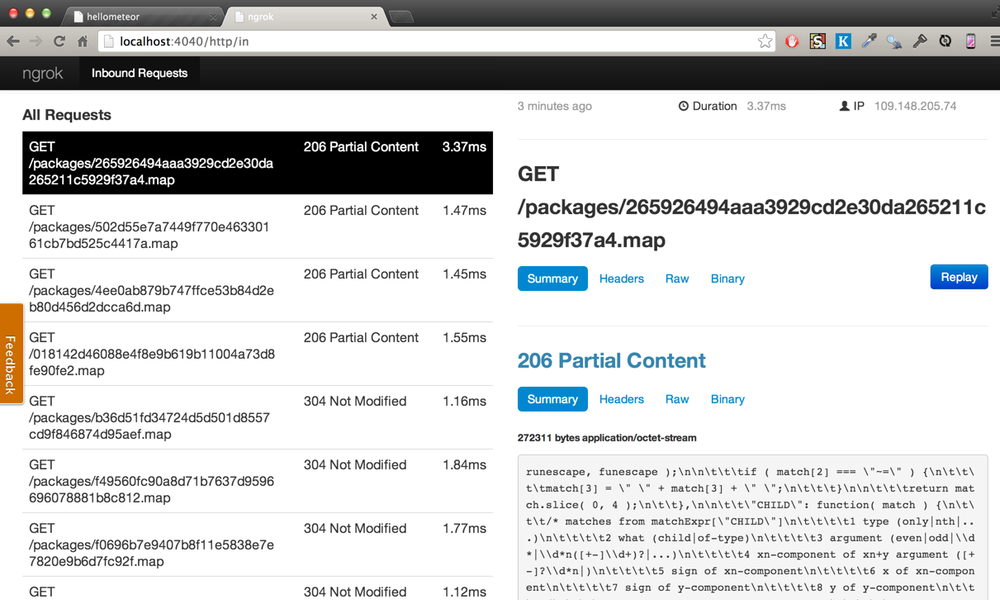
Ngrok also provides you with traffic analyser, available on http://localhost:4040/. In addition to console log, you can view in real time how packets are requested and sent, as well as dig into the packets for more curious details.
Level 2: SSL tunnel via proxy
Ngrok also supports tunnelling via proxy. You can use following configuration in the ngrok config file, which is loaded from ~/.ngrok location by default:
http_proxy: "http://user:password@10.0.0.1:3128"
This works well if your machine has unrestricted SSH access to the outer world via port 22. What to do, if you don't have SSH access?
TCP tunnelling to the rescue! Ngrok is smart enough to figure out which port is open, and if your normal SSH port is closed for some reason, it will enable tunnelling via SSL port 443.
Let's see now how this works with PageKite. Once you download the script, run it with this slightly less documented argument to enable connection via proxy:
pagekite.py --proxy=http:user:password@yourproxyip:proxyport
When running PageKite script for the very first time, it will ask you to register and create username/password. Interesting details is that you'll need to specify proxy only once, to let the registration pass through. After that PageKite will save user info into a local config file, and use it for authentication. No need to specify proxy after that - PageKite will get the info from a local config and use it for all future connections.
Level 3: Dynamic altering of the host header value
If you app runs on IIS server, it will normally be accessible via localhost:80. You would normally map your app name to the localhost in the hosts file, and then, when opening your app url from the browser, request header would contain proper host value, based on which IIS server will decide which app to serve back.
This is all great, but if we simply make a tunnel to the localhost:80, we'd get an IIS welcome page, and not our app. That's because the HTTP request header doesn't contain proper value to identify our app.
If we try and modify request header on the browser while requesting one of the URL:s on PageKite or Ngrok services, we would get another error from the tunnelling service itself. Thing is that both PageKite and Ngrok are able to map requests to the proper tunnels based again on the HTTP host header value.
We need some sort of way to tell the tunnelling service to alter the hosts header for this particular tunnel before forwarding request. To achieve this we are going to use PageKite's super useful +rewritehost feature.
pagekite.py mywebapp.local:80 mywebapp.pagekite.me +rewritehost
Now when requesting mywebapp.pagekite.me, PageKite service will rewrite host header with mywebapp.local value, and our IIS server will be able to correctly serve our app.
Level 4: Tunnelling with reverse proxy
What if we have a web app consisting of multiple server URL:s? For example:
www.myapp.com:80- root url to request the appresources.myapp.com:80- url used by the app client side to request static filesapi.myapp.com:80- API services url used by the main app on the client
Now it's not enough to tunnel just one mainapp.local:80 url to the outer world. Let's imagine this for a second:
www.myapp.com:80is tunneled to the public viamyapp.pagekite.meurl.- You open this url on the client. The app is loaded on the client and starts requesting static assets from
resources.myapp.com:80and api services fromapi.myapp.com:80. Both of these will fail. - Even if you make two additional tunnels for the resources and api services, the client won't be able to map those public tunnel URL:s to the URL:s expected by the app.
We are going to setup our very personal proxy server to handle all of these issues.
Let's setup a micro EC2 Amazon AWS instance. The best part is that micro instances are free, and their limited resources usually are more than enough for our proxying needs.
Use your key pair to be able to SSH into your new and shiny EC2 instance:
ssh -l ubuntu -i ~/.ssh/mykey.pem ec2-something.eu-west-1.compute.amazonaws.com
Nginx is a natural choice for the proxy server. SSH to your new and shiny EC2 instance and install Nginx.
Here is an example configuration for the Nginx proxy. Assuming that www.myapp.com is our main site, and resources.myapp.com is additional service for our app, and both of those url:s are tunnelled via separate tunnels on PageKite:
server {

  server_name www.myapp.com;

  location / {

    proxy_pass http://myapp.pagekite.me;

    proxy_redirect off;

    proxy_buffering off;

  }

}
server {
 server_name resources.myapp.com;
 location / {
 proxy_pass http://myappresources.pagekite.me;
 proxy_redirect off;
 proxy_buffering off;
 }
 }
Launch or restart Nginx with sudo nginx -s reload command.
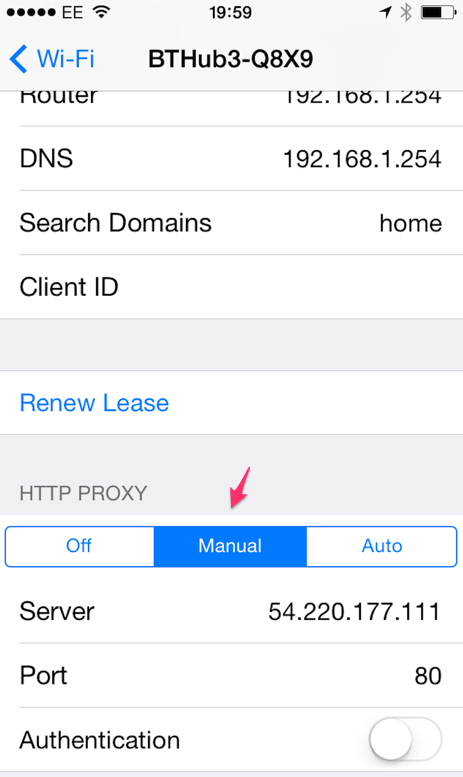
The interesting part is to route all requests from your browser via our new proxy. This is easily achievable on a desktop browser via Network Settings. On iOS you can setup manual proxy in Wi-Fi settings.
After doing so, all network requests from your device will go through our proxy - and we are finally in full power to do what we want - to route certain requests to another location. In particular, all requests to resources.myapp.com will be routed to http://myappresources.pagekite.me, which is the url of the public tunnel for our resources served on the local server. Again, use +rewritehost option on PageKite if you are running the app on a host header sensitive server.
Couple of words on security
Obvious concern is how do you know your super secret Facebook killer web app is not going to be compromised while you are streaming it to the public web? Here are few thoughts on this:
- Your tunnel from localhost to the service is encrypted, often with your personal SSH keys
- Usually you have option of accessing your tunnel via http or https url:s, provided by the service
- Both Ngrok and PageKite can generate random url:s every time you restart a tunnel. This might not be very convenient since you'll have to copy-paste new url every time, and probably reconfigure some of your test suits. But this adds additional security layer.
- Both Ngrok and PageKite offers you simple http password protection. Here is example command for PageKite:
pagekite.py 80 foo.pagekite.me +password/bjarni=testing - PageKite also offers you whitelisting of the allowed IP:s:
pagekite.py 80 foo.pagekite.me +ip/1.2.3.4=ok +ip/4.5.6=ok
Conclusion
Local tunnelling is a perfect way of freeing your web app to the outer world while it is still being developed. In a modern responsive/adaptive world the apps are still being developed on desktops, with desktop browsers. With local tunnelling you can easily develop your app on any mobile device using any mobile browser and not just emulation. You can also share the app to a client, UX designer, fellow developer or test engineer for any kind of purposes. With a fast paced development sometimes it's really nice to try feature on a target device even before it is deployed to staging or production servers.